If you have issues from a third-party bug tracking tool, you can upload them into TestMonitor with a simple import. TestMonitor’s import functionality also makes it easy to import any backups you’ve previously made of your issue data.
Before You Begin
Make sure that the issue feature is enabled before beginning.
Preparing your Import File
You can import issues from two different file types: CSV or Excel. The header row of the file is used to map your import fields. Both file types will need certain importing fields and specifications that are detailed below:- Name: This field requires a value and has a 255 character maximum.
- Description: This field is optional and allows for rich text formatting.
- Category: This is a required field and must match the categories in your project.
- Priority: This is an optional field. The input needs to match the priorities in your project.
- Assignee: This is an optional field and the input needs to match the project members.
- Resolution: This is an optional field that requires input that matches the resolutions in your project.
The file cannot exceed 5MB
Here is an example of a CSV import file and you can also view our sample Excel file.
---------
Not all fields available when creating issues can be imported. The issue code is automatically generated and cannot be imported. Affects and fixed versions, attachments, tags, and tasks can only be added after the import. You can also link test results once issues have been imported into TestMonitor.
Running the Import Wizard
Upload File
- Click on Resolve in the navigation menu.
- Click the three dots in the top right corner of the page and choose Import…
- Drag and drop, or click to select your import file. Click Mapping in the bottom right to access the next step.
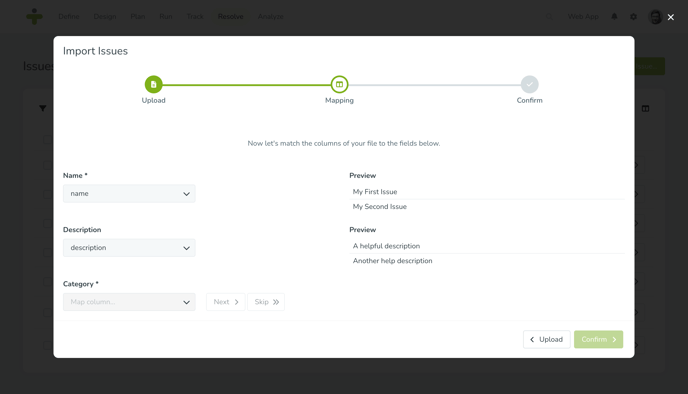
- Click the dropdown Map Column… and select the field from the file you want to be imported. Check if the preview shows the right data (it shows the first 5 records).
- Click Next to map the next column. If you don’t want to import an optional field, you can choose Skip. If you have defined any custom fields, they will be listed here as well. Continue to map every column from your import file.
- Choose to Confirm in the bottom right when finished mapping all file columns.
- Click Finish in the bottom right to import all of the mapped file information.
- You will receive a notification alert and an email when your import has been completed!
If there is an import problem, the email notification will contain details on the nature of the problem, including the row number.
Revert an Issue Import
You can view previous issue imports on the Imports & Exports page. When viewing previous imports you also have the option to revert an import.
You can only revert an issue import if there are no test results linked to the imported issues.
- Click the Settings icon in the top right navigation.
- Select Imports & Exports in the left menu.
- Click the Imports submenu (which is the default).
- Locate the import you wish to undo and click the Revert icon on the right.