In TestMonitor you can disable list options that aren’t supporting your project and create additional options to meet the needs of your project. This customization ensures that all features are used to the benefit of your project and that your test data is concise and simple to use. You can customize the lists for requirements, risks, milestone and issues.
Please note that you must have a Professional or Enterprise plan subscription to access this feature.
Lists Overview
The lists overview page provides a place to view and manage the list options for your project. To manage the lists for a project, go to the project settings. Select Lists from the left menu.
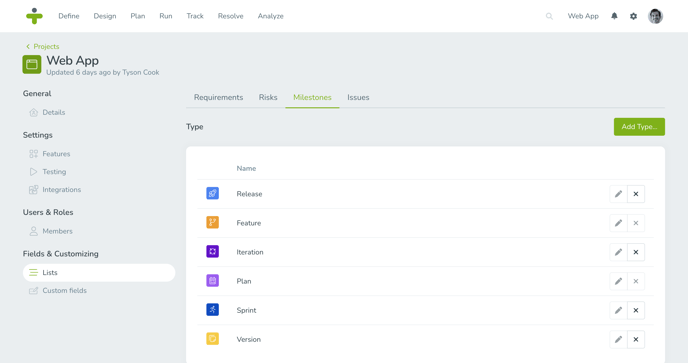
There are submenus for each of the customizable lists:
- Requirements: An overview of the different requirement types.
- Risks: An overview of risk classifications.
- Milestones: An overview of milestone types.
- Issues: An overview with further submenus for issue statuses, categories, priorities, and resolutions.
Hide and Restore Default Options
It’s easy to hide and restore the default options TestMonitor provides for the different customizable lists. To hide a default option you do not want to use in a project, click the cross next to the name and confirm by clicking the Hide button.
When you disable an option it will no longer be available when creating and editing data. However, if the option was already used in your project, it will remain assigned to any object previously selected unless manually removed.
When one or more default options have been hidden, you can restore them by simply clicking the Restore defaults button. Any previously hidden default options will be revealed again.
Add Custom Options
If your project needs options beyond the defaults provided by TestMonitor, you can easily add custom options. In the desired list, click the Add button. You will have to enter a Name as well as a Color or Icon to identify the new list item.
Update Custom Options
You can update custom options at any time on the list overview page. To update an option in a list, hover over the option until a pencil icon appears. Click the icon and update the fields as necessary.
Default options cannot be updated. You can, however, hide or restore default options for a project.
Reorder Custom Options
You can also update the order of list options by clicking on the row and dragging an option up or down the list. Reordering the list will determine the order options appear in the dropdown of your project.
Delete an Option
If you made a mistake with, or no longer want a custom option, you can remove it from the overview screen. To delete a custom option, click the cross in the option row.