As your project grows so does the data it contains. TestMonitor makes it easy to find the data relevant to you with tools such as filters and sorting on overview pages. Filters let you see a subset of data while sorting columns lets you specify the order the data appears in. This will save you time finding the information that you need.
You can also adjust the columns that display information on the overview pages. You can hide columns with information that you don’t need and add columns with data that’s relevant to you. This will support you in reviewing the data you actually need and filter out the unnecessary.
Apply Filters
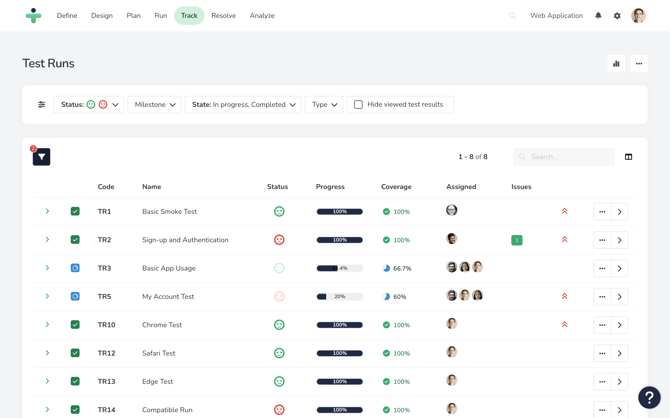
On an object’s overview page, click the filter icon to open the filters at the top of the page. When you open the filter options, the icon will change to green to let you know that they are now active. Select the information you would like to use to filter your data and the subset of resulting data will display in the overview below.
Use ‘f’ as a shortcut to open the filter options.
If you need additional options to filter your data by, click the sliders icon to the left and select More Filters. This will open a popup with all available filters for you to choose from.
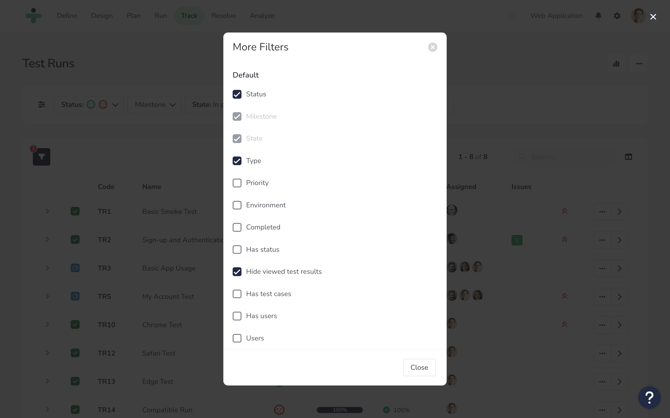
When custom fields are defined, some will be available as filters as well. The following types can be used as a filter:
- Dropdown
- Multi-select
- Checkbox
- Date
- User
Custom field filters are listed in the Custom group.
Use the sliders icon to the left to clear all filters by clicking Reset to default.
Save and Apply a Filter Set
You may use some filters, or a combination of filters, frequently and want to have them available quickly.
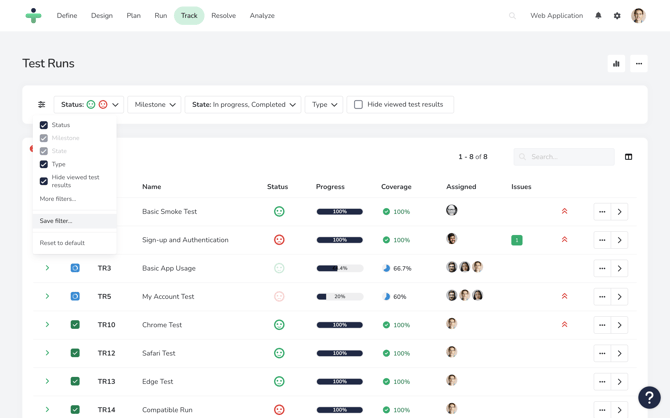
Rather than selecting filter options every time, you can save a filter set. Save a filter set with the steps below:
- Open the filter menu and select the desired filters.
- Click the three sliders left from the filters and select Save filter. A pop-up box displays.
- Enter a filter Name.
- Select Save.
- Open the filter menu.
- Click the three sliders left from the filters and select the desired filter set, by clicking on its name.
Sort Data
Sorting your data lets you organize the order information is displayed in. For example, you may want to see the most recently updated record, or might want to see them in alphabetical order. You can easily sort data in TestMonitor by clicking on column names.
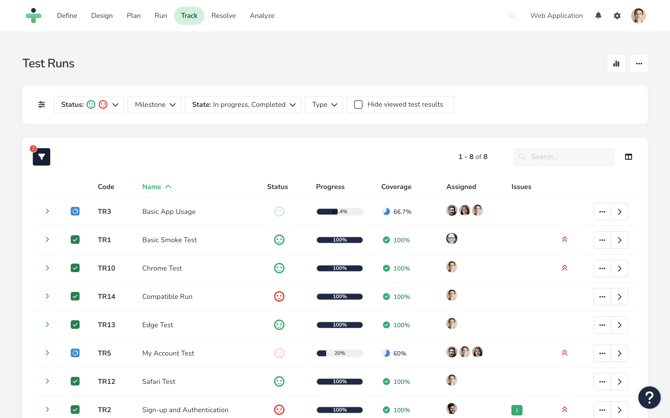
When you click a column name, all of the data will sort in either ascending or descending order. For example, the first time you click the Name column for requirements, the requirements will sort A-Z on the page. If you click the column again, the requirements will switch to displaying in Z-A order. If the column contains dates, they would sort from most recent to oldest, and then oldest to most recent when clicked again.
Select Columns
Overview pages show a set of columns by default, but you may want to get different information from TestMonitor than the defaults provide. In TestMonitor you can adjust the columns that will display in the overview.
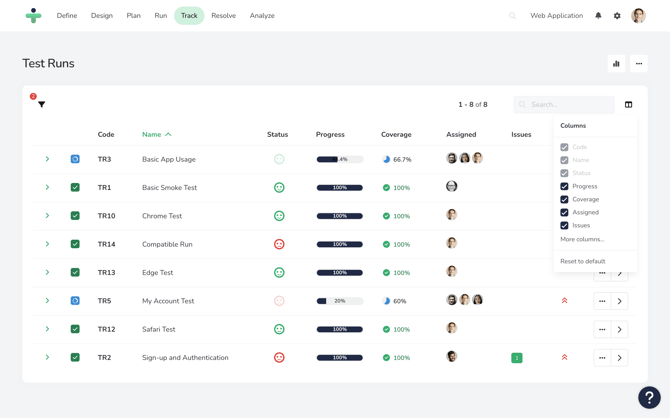
To adjust columns, click the column icon on the right of the table. Select or deselect which columns will display from the options. If you still need more column options, click More columns to see all available columns.
Some columns like Code and Name can’t be deselected.
When custom fields are defined, they will be available as columns as well. They are listed in the Custom group.
If you want to clear your column settings and go back to the default overview setup, click Reset to default. The overview will go back to displaying the default column options.
Use ‘r’ as a shortcut to reset all filters and columns to the default settings.
Order Columns
Overview pages display columns based on a default layout. Sometimes you may want to change the display order to show the most useful information within your view.
To reorder a column, follow the steps below:
- Click and drag the column heading for the column you want to move.
- Drag it over to where you want it to be and release the mouse button.