Roles are assigned by project in TestMonitor, allowing you to fine-tune what a user can access as needed across projects. By assigning roles to users, you are able to keep your project secure by granting them the level of least access needed for them to complete their work.
The menu items and the options visible for a project on TestMonitor will vary depending on a user’s role and permissions. If a user does not have access to manage issues, then they will not see the menu option to access any issue information, simplifying their view to only the items relevant to them. For example, in one project a user may only need to run tests while in another project, the same user may be in charge of issue management. By assigning the user a role for which access is limited to what they require, you have made it easy for the user to focus on what is needed from them in each project.
If a user is not assigned any role for a project, the project will not be visible to the user in TestMonitor.
Roles Overview
You can view all available roles by clicking the Settings icon in the top right navigation menu and selecting Roles in the left menu.
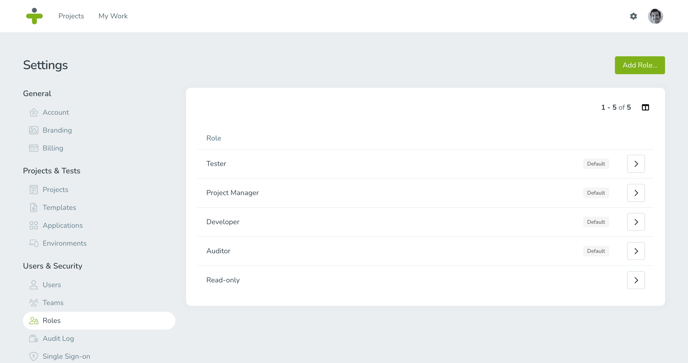
There will always be 4 default roles to start with in TestMonitor:
- Tester: A tester is allowed to run tests.
- Project Manager: A project manager has full access to the project assigned.
- Developer: A developer has full access to the issue management of the project assigned, and can view test results.
- Auditor: An auditor has complete, read-only access to the project.
Admin users have full access to the TestMonitor environment, but also need to be assigned a specific role to have access to a project. Their administrator rights allow them to assign (and unassign) themselves to each project within the environment.
Add and Update a Custom Role
Aside from the default roles, it’s possible to create and update your own custom roles with permissions as required.
The first step to adding a custom role is:
- Open up the role overview page in Settings.
- Click Add Role in the top right.
- Enter a Name that explains the new role and enter a Description if applicable.
- Select Add.
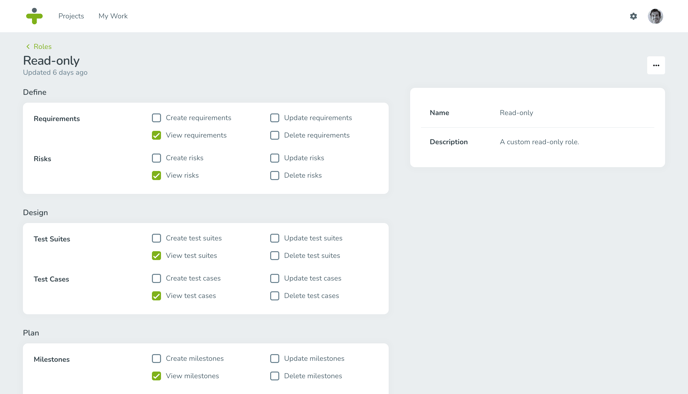
- Click the right arrow of a role to open the role details page.
- Edit the Name or Description by hovering your mouse over the field and selecting the pencil icon.
- Click the checkboxes to add permissions to the selected role. Uncheck boxes to remove permissions.
You can give a user multiple roles within a project. So when you want a user to have more permissions than an already existing role, you can just create a new role with these permissions and stack the roles when assigning project members. This is helpful when there are unique users with a lot of permissions as it allows you to combine roles rather than have to make a new one for each specific user.
Delete a Custom Role
You can easily delete a custom role when it is no longer needed:- Click the right arrow of a role to open the role details page.
- Select the three dots in the top right corner.
- Click Delete.
Only unassigned roles can be deleted. A role assigned to one or more users must first be removed for those project members to be deleted.