Organize and group series of Test Cases into Test Suites.
Test suites are a way to organize your project’s test cases, much like folders are used to organize groups of individual files. Some projects may only need one test suite while others may require several.
Test suites help keep information streamlined and organized. For example, a project may have test suites for different platforms such as iOS and Android or even different functions such as for an inventory feature or sales feature. Different test suites can also be made to separate different test types, such as functional or non-functional or even test scenarios for important end-user work flows. Creating separate test suites allows each to have a unique set of test cases that stakeholders can clearly find and work with.
Test Suites Overview
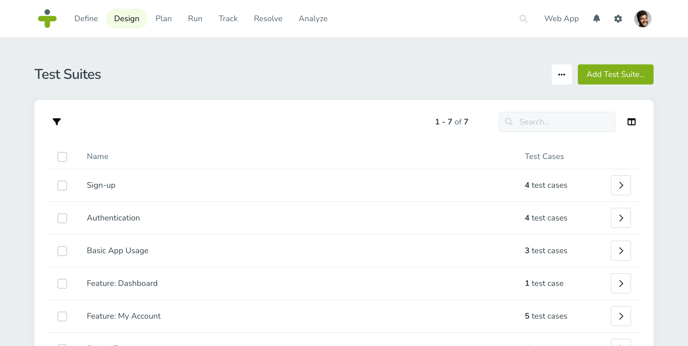
The test suite page shows a list of all the test suites created for your project containing links to associated test cases. Click Design in the navigation menu to view test suites.
Add a Test Suite
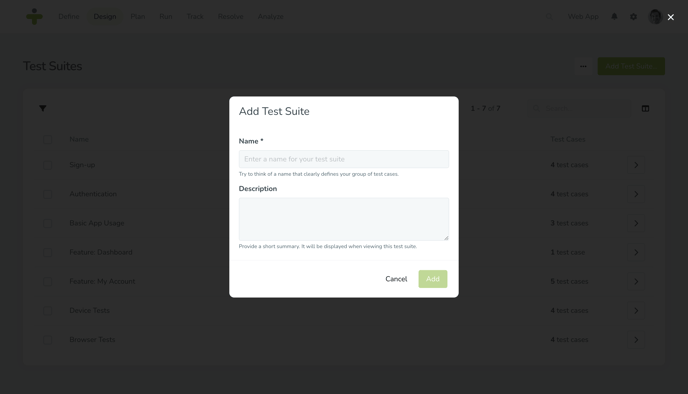
If you want to create a new test suite, click the green Add Test Suite button in the top right corner of the test suite page. A popup will appear where you can fill out the various fields of the test suite you’re creating.- Name: This is the best way to define your group of test cases, try to choose something memorable and simple.
- Description: This is an optional field where additional information about a test suite can be added. Here you can further define the group of test cases that are going to be housed in the test suite.
Update a Test Suite
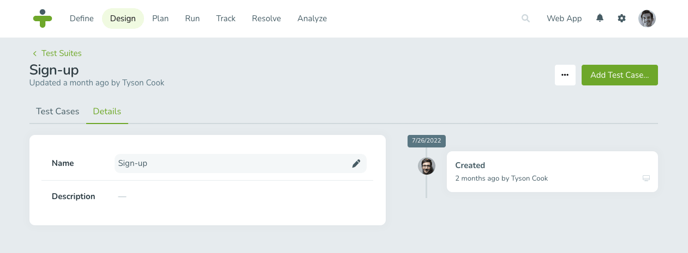
You can easily update a test suite with the steps below:- On the test suite overview page, click in the name column or right arrow button to open up the individual test suite.
- Select Details from the submenu.
- Hover over a field and click the pencil edit icon. Save any changes made to a field.
Delete a Test Suite
To delete an individual test suite:- On the test suite overview page, click in the name column or right arrow button to open up the individual test suite.
- Click on the three dots in the top right corner and select Delete.
- On the test suite overview page, use the check box next to the test suite's name to select the test suite. Repeat this for every test suite you want to delete.
- Click the Selected button in the toolbar and then click Delete in the dropdown.
Deleting a test suite will delete all related test cases and test results. All related test cases will also be disconnected from their test runs and affect the outcomes of those test runs.
Restore a Test Suite
When you restore a test suite, the linked test cases will also be restored and they will be reassigned to the test runs.
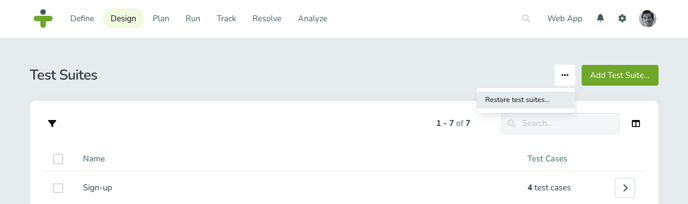
- Click the three dots in the top right corner of the test suite overview page, and then click on Restore test suites. A list of all trashed test suites displays.
- Locate the test suite you want to restore and click the arrow button.
- Click Restore in the confirmation box and the restored test suite will now display on the overview page again.
Relate Test Cases
The entire purpose of test suites is to neatly organize the different test cases needed for your project. By clicking individual test suites you can see all associated test cases as well as add and edit test cases.