Project templates are blueprints that can be deployed over and over again to add data to an existing project or simplify a new project setup. For example, your company may create a new project for every software release. If you use a standard set of test cases with linked requirements for each test, you’re manually typing the same information repeatedly. Instead, you can simply apply a project template with your design to every new release project.
With the ability to apply project templates, you can “stack” them. This means that you can add as many templates as you want to a single project. Take advantage of this to modularize templates and use them as building blocks for your projects.
Project Templates Overview
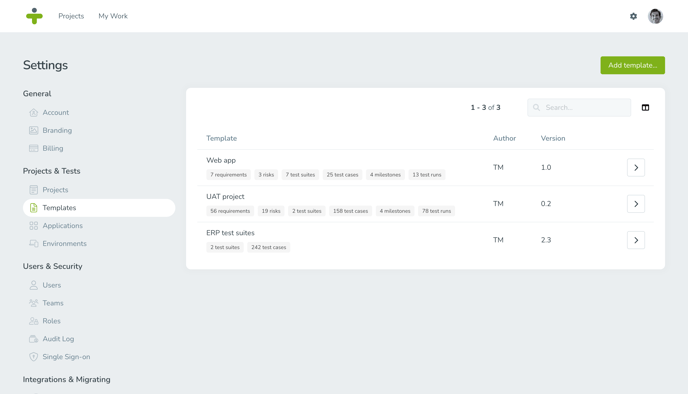
Admin users can see and manage templates on the project templates overview page. Click on the Settings icon in the top right navigation menu and select Templates in the left menu to see the overview page.
Add Project Templates
You can publish a new template by clicking Add Template on the template overview.
You can also go to the projects overview via the settings and select a project you want to publish as a template. Click the three dots to the right and select Publish as a template.
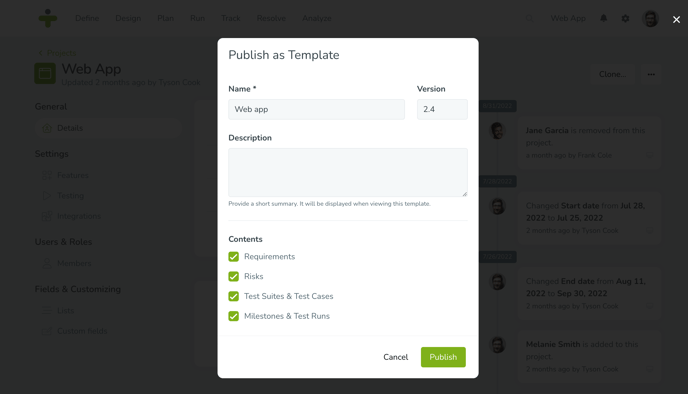
The following fields appear when creating project templates:
- Select Project: If you are creating a template for the project you had open, this will autofill with the project name. Otherwise, click the dropdown to select the project you wish to turn into a template.
- Name: This is a required field and used to identify the template.
- Version: This is an optional field where you can identify a version number for the template.
- Description: This is an optional field to add extra information about the template.
- Requirements: Checking this box means all requirements and links in your project will be copied to the template.
- Risks: Checking this box means all risks in your project will be copied to the template.
- Test Suites & Test Cases: Checking this box means that all test suites and all test cases will be copied to the template.
- Milestones & Test Runs: Checking this box means that all the milestones and test runs will be copied to the template. This includes the dates for milestones and test runs, which will be used to recalculate the dates for your new project. Assigned users of the test runs will not be copied to the template.
If one of the objects, such as requirements, isn’t used in the project you are publishing as a template, the option will be greyed out in the popup.
Please note that custom fields are not included when publishing a project template.
Update Project Templates
You can update the name, version, and description of templates after they have been created. To update a project template, navigate to the project template overview page and click the right arrow or the template name. This opens the template details page. When you hover over the editable fields, a pencil icon will display to update the information.
The template details page also gives you an overview of the data in the template.
Create a New Project from Project Templates
Once you have created project templates, you can use them to jumpstart new projects with their setup. To create a new project from a template, click the Settings icon in the top menu. Select Projects in the left menu and click the Add Project button.
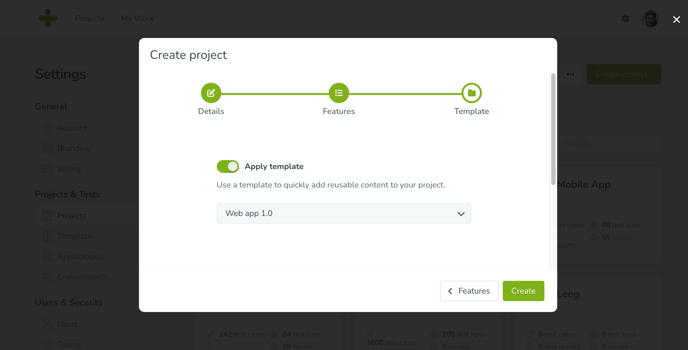
A popup will guide you through the project creation process. Complete the Details and Features section of the wizard.
When you reach the last step, select Apply Template and select the desired project template from the dropdown.
The milestone and test run dates in the project will be calculated based on the dates in the template.
Apply a Project Template to an Existing Project
Templates are not limited to starting new projects. When working on a project, you may realize that you need similar data from another already existing project. You can use a template to add the template data to the existing data in your project.
There are two ways to apply a project template. To apply a template from the project settings:
- Go to settings by clicking the cog in the top menu.
- Select Projects in the left menu and click the project you want to add template data to.
- Click the three dots at the top right and select Apply Template.
- A popup lets you select the template you want to add from a dropdown with all templates.
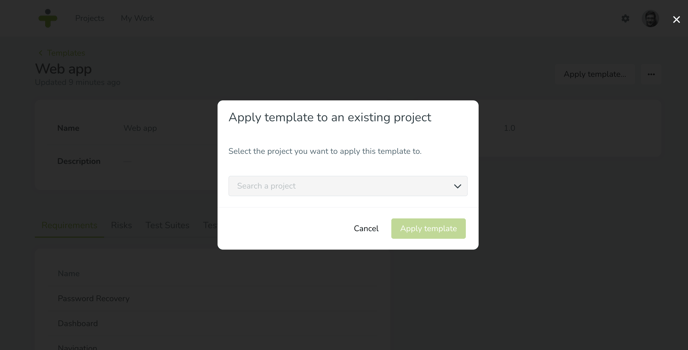
- Open the templates overview page and click the arrow next to the template you want to add to a project.
- On the details page, click Apply Template to the top right and select the project you wish to add the template to.
Delete a Template
If you made a template by mistake or no longer need it for your projects, you can easily delete it from TestMonitor.To delete a project template:
- Open the template details page for the template you want to remove.
- Click the three dots in the top right corner and select Delete.
You can only delete the templates you have created. Default templates, of which TestMonitor is the author, cannot be deleted.