Requirements are specifications of what is expected from the software. On this page, you'll learn more about the benefits of using requirements, and how to use them in TestMonitor.
Your project can benefit from clear, well-defined requirements for several reasons. First, because they provide consensus on the expectations of all stakeholders. With these expectations written down, you can set clear goals for your project and avoid discussions afterwards. Requirements provide direction towards what needs to be tested and help to structure your test design. They enable the stakeholders to report and communicate about the software specifications.
In TestMonitor requirements can be used to group related test cases, test results, and issues. When using the reports, you can easily see which requirements pass and which fail.
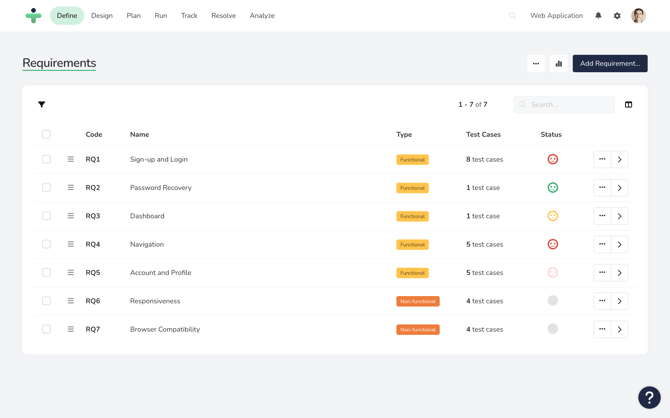
The requirement status reflects the overall result of all test cases linked to that requirement, based on the most recent test run for each case.
Add a Requirement
If you want to create a new requirement, click the green Add Requirement button in the top right corner of the requirements overview page. A popup will appear where you can fill out the various fields of the requirement you are creating. This includes:
- Type: In this dropdown menu, you will be able to choose from among four options for the type of requirement (It’s possible to customize the requirement types to fit your project needs):
- Functional
- Non-functional
- User
- Business
- Name: It’s a good idea to choose something to the point and that will be easy to remember. This will make managing the requirements later much easier.
- Description: Optionally, add some extra information about the requirement by adding a note, a reminder, or a few simple words that give some more quick insight into the requirement.
- Tags: Below the description field, you will see a + More option to click. Clicking on this icon provides you with an additional way to organize your requirement using tags. You can add one or more tags to the requirement.

If you have defined custom fields for requirements, they will show up here when the Show on Form option is enabled. You can manage your custom fields for requirements in the Custom fields section in the project settings.
Click Add in order to create the requirement and to return to the requirements overview page.
If you have a requirements document, it might be helpful to import the file instead of creating the requirements one by one.
Update a Requirement
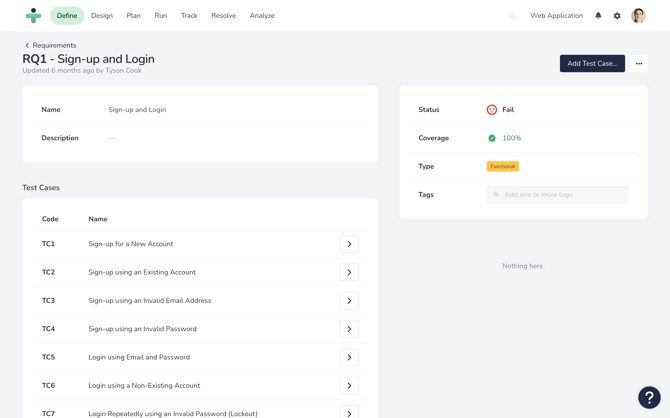
You can update a requirement in both the sidebar view of the requirement and the detail page. In both views, you can update the basic fields of a requirement.
To see the sidebar view of a requirement, click anywhere in the requirement row and a panel with requirement information will popup on the right. To see the detail page for a requirement, click on the code or right arrow and a new page will open with the issue information. To update the information:
- Hover over a field and click the pencil edit icon.
- Click the save icon by each field to keep the changes made.
Related Test Cases
To give substance to your requirements, you will probably start to design test cases. Your test cases can be assigned to one or more requirements. When you open a requirement, you can see the related test cases for that requirement on the test cases section.
Delete and Restore Requirements
- Click the three dots in the top right corner of the requirement detail page.
- Choose Delete and confirm that you want to delete this requirement.
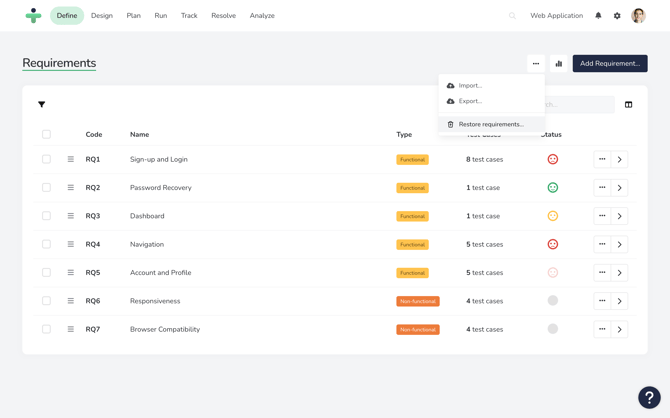
- Click the three dots in the top right corner of the requirement overview page, and then click on Restore requirements. A list of trashed requirements displays.
- Locate the item you want to restore and click the arrow button.
- Click Restore in the confirmation box, and the restored requirement now displays on the overview page again.
When a requirement is deleted, it will also be un-assigned from all related test cases. When you restore a requirement, the link with the related test cases will also be restored.
Batch Update Requirements
- Use the check box next to the requirement's code to select the requirement as part of your batch update.
- Select additional requirements, as required. To select all, check the box in the table header.
- Click the selected button in the toolbar:
- When you select Update, a pop-up box displays. This is where you choose to change the Type and Tags for all selected requirements.
- When you click Delete all the selected requirements will be deleted.